The Walk About Quilt is a modern, beginner-friendly design featuring geometric shapes and clean lines, perfect for showcasing vibrant fabrics and creating a stunning, quick gift.
Overview of the Pattern
The Walk About Quilt pattern features a modern, versatile design with geometric shapes and clean lines. It combines simple squares, rectangles, and Half-Square Triangles (HSTs) for a visually appealing layout. Suitable for all skill levels, the pattern offers clear instructions and optional diagrams, making it accessible for beginners. The design allows for showcasing vibrant fabrics and creates a charming, modern quilt. Finished sizes range from throw to king, offering flexibility for various projects. Perfect for gifts or home decor, this pattern is both efficient and rewarding to complete.
Suitability for Beginners
The Walk About Quilt pattern is ideal for beginners due to its clear, easy-to-follow instructions and simple construction. It uses basic shapes like squares and rectangles, making it a great introduction to quilting. Optional diagrams guide quilters through each step, ensuring accuracy and confidence. The pattern’s efficiency and straightforward design allow beginners to complete a beautiful quilt quickly, making it a perfect project for skill-building and creative expression. Its flexibility in fabric choices also adds to its appeal for new quilters.
Fabric Requirements and Selection
Choose five coordinating fabrics, preferably cotton, for ease and variety. Select fabrics that complement your style, from bold to neutral, and match or contrast thread color accordingly.
Choosing Five Fabrics
Selecting five fabrics is essential for the Walk About Quilt. Opt for cotton fabrics, as they are easy to work with and offer a wide color variety. Choose fabrics that complement your style, whether bold and vibrant or subtle and neutral. Ensure the fabrics coordinate well to create a balanced look. Bright, contrasting fabrics will make the pattern stand out, while neutral tones can provide a softer, more understated effect. Consider using a unifying color or texture to tie the fabrics together for a cohesive design. This step allows for creativity and personalization, making each quilt unique. Tutorials often provide examples to help visualize fabric combinations.
Calculating Fabric Yardage for Different Quilt Sizes
Fabric yardage varies based on quilt size. For a Throw (61×61″), use 1.5 yards of main fabric, 1.1 yards of coordinating fabric, and 0.5 yards for binding. Twin (70×90″) requires 3.5 yards of main fabric, 2.5 yards of coordinating fabric, and 0.75 yards for binding. Queen (86×106″) needs 4.5 yards of main fabric, 3.5 yards of coordinating fabric, and 1 yard for binding. King (106×106″) requires 5.5 yards of main fabric, 4.5 yards of coordinating fabric, and 1.25 yards for binding. Always add 10% extra for mistakes;
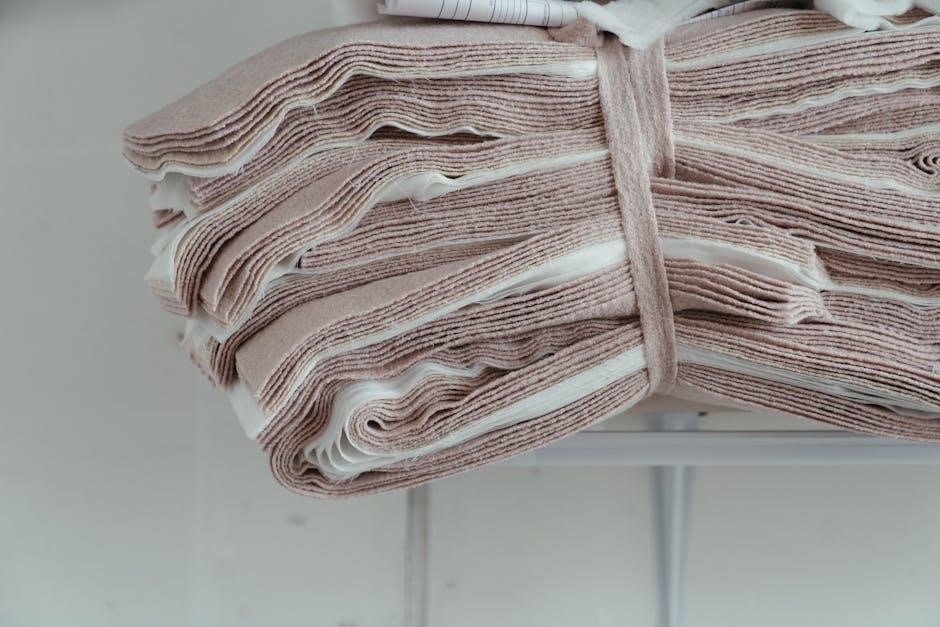
Fabric Cutting Guide
Fabric Cutting Guide
The Walk About Quilt involves cutting 6.5″ squares and 3.5×6.5″ rectangles from main and background fabrics. Press seams and trim for accuracy.
Measuring and Cutting Squares
Begin by measuring and cutting 6.5″ squares from both main and background fabrics. Use a rotary cutter and mat for precision. Ensure fabrics are pressed and free of wrinkles before cutting. Trim excess fabric carefully to maintain accurate square sizes. For rectangles, cut 3.5×6.5″ strips, matching main and background fabrics. Press seams toward the darker fabric after cutting to prepare for block assembly. Accuracy in cutting ensures seamless block construction and a professional finish.
Creating Rectangles
Cut 3.5×6.5″ rectangles from both main and background fabrics, ensuring precise alignment. Use a rotary cutter and mat for accuracy. Press seams toward the darker fabric after cutting. Trim any excess fabric to maintain uniformity. These rectangles will complement the 6.5″ squares in forming the quilt’s geometric design. Accurate cutting is crucial for seamless block assembly and a professional finish. Always press fabrics before cutting to eliminate wrinkles and ensure straight edges. This step ensures your quilt blocks align perfectly.
Constructing the Quilt Blocks
Constructing the quilt blocks involves combining 6.5″ squares and 3.5×6.5″ rectangles, creating a modern geometric design. This method is efficient and ideal for beginners.
Understanding Half-Square Triangles (HSTs)
Half-Square Triangles (HSTs) are a fundamental element in the Walk About Quilt pattern. They are created by sewing two squares of fabric together along a diagonal line, then cutting them apart to form two triangles. This method is efficient and accurate, making it ideal for achieving sharp, clean angles. Pressing the seams toward the darker fabric ensures a professional finish, while trimming each HST to 6.5″ ensures uniformity. HSTs add dynamic movement to the quilt’s design, making them a key component of its modern aesthetic appeal.
Assembling Each Block
Each block in the Walk About Quilt is constructed using one 6.5″ square from the main fabric, one 6.5″ square from the background fabric, and two 3.5″ x 6.5″ rectangles (one from each fabric). The squares are sewn together diagonally to form two Half-Square Triangles (HSTs), which are then trimmed to size. The rectangles are added to complete the block layout. Pressing seams toward the darker fabric ensures a clean finish, while the combination of squares and rectangles creates a balanced, visually appealing design that highlights the main fabric.
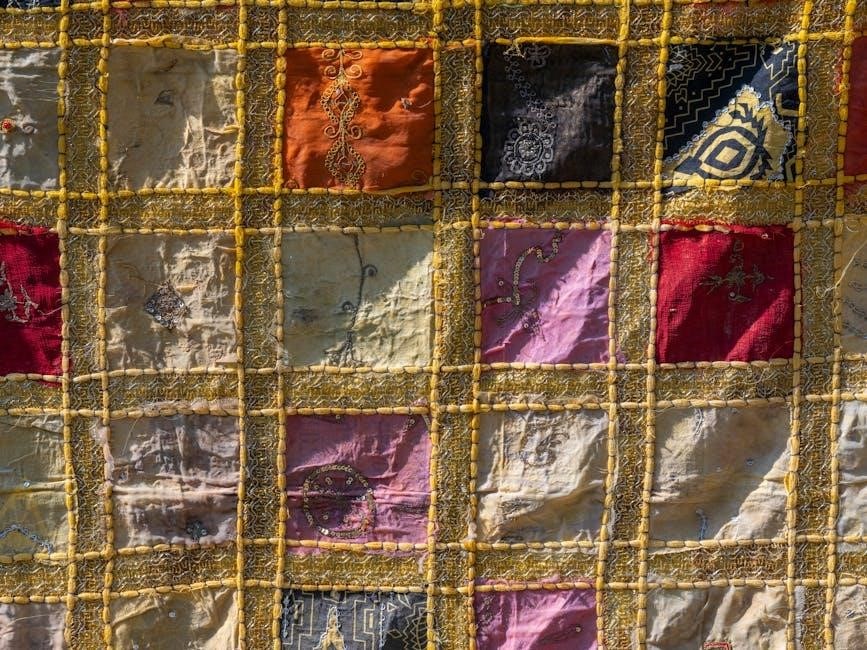
Designing the Quilt Layout
The Walk About Quilt layout features a grid arrangement of blocks, creating a modern, balanced design. Each block’s geometric shapes and fabric choices work together for a cohesive, visually appealing pattern.
Planning the Block Arrangement
Planning the block arrangement involves organizing the quilt’s layout to achieve a balanced and visually appealing design. Start by determining the number of blocks needed based on the desired quilt size. For a lap quilt, 5×7 blocks are ideal, totaling 35 blocks. Arrange the blocks in a grid, alternating main and background fabrics to create contrast. Ensure the pattern flows smoothly, with each block complementing its neighbors. Use graph paper or digital tools to sketch the layout and make adjustments as needed for symmetry and harmony. This step ensures the quilt’s overall aesthetic is cohesive and engaging.
Visualizing the Pattern
Visualizing the pattern helps quilters anticipate the finished design. Use graph paper or digital tools to sketch the layout, ensuring balance and harmony. Consider the arrangement of main and background fabrics to create visual interest. This step allows for adjustments to block placement, color distribution, and overall symmetry. By previewing the design, quilters can ensure the pattern flows naturally, achieving a cohesive and visually appealing quilt. This pre-planning enhances creativity and precision before sewing begins.
Assembling the Quilt Top
Sew the blocks together, aligning seams carefully for accuracy. Press seams consistently to ensure a smooth, polished finish. This step brings the quilt top to life.
Sewing Blocks Together
Arrange the blocks in the planned layout, ensuring edges align perfectly. Sew the blocks row by row, using a 1/4-inch seam allowance. Press seams consistently to one side for a smooth finish. Match seams carefully to maintain accuracy and avoid puckering. This step requires patience but results in a polished quilt top. Beginners will find the process straightforward, while experienced quilters will appreciate the efficiency of assembling the blocks into a cohesive design.
Matching Seams for Accuracy
Matching seams is crucial for a professional finish. Press blocks before sewing to ensure crisp edges. Pin seams at intersections, aligning raw edges carefully. Use a walking foot or even feed to maintain fabric control. Sew slowly, guiding fabric precisely. Backstitch at the beginning and end of seams for durability. This attention to detail ensures that the quilt top lies flat and the pattern remains consistent, making the finished quilt visually appealing and well-crafted.

Completing the Quilt
Completing the quilt involves layering, quilting, and binding. Press the binding in half and attach it to the edges. Wash gently and trim loose threads for a polished finish.
Layering and Quilting
Layering involves placing the quilt top, batting, and backing fabric together, securing them with pins or spray. Quilting can be done with a sewing machine or by hand, using simple straight lines or free-motion patterns to add texture and hold the layers together. Choose thread colors that complement the fabrics. Pressing the seams before quilting ensures a smooth finish. This step brings the quilt to life, transforming it into a cozy, finished piece ready for binding.
Binding the Edges
Binding the edges is the final step to complete your Walk About Quilt. Cut the binding fabric into 2.5-inch wide strips, then sew them together to form a continuous length. Press the seams open for a smooth finish. Attach the binding to the quilt top edges, folding at the corners for a neat fit, and sew in place. Fold the binding over to the back and hand-stitch for a professional finish, securing the edges neatly and adding a decorative touch to your quilt;

Additional Resources
Find tutorials, diagrams, and community support online to guide you through the Walk About Quilt pattern. Join quilting forums or watch videos for tips and inspiration.
Using Tutorials and Diagrams
Tutorials and diagrams are essential for mastering the Walk About Quilt pattern. Step-by-step guides provide clear instructions, while visual aids help quilters understand complex techniques like HSTs. Online resources offer downloadable PDFs with detailed images, making it easier to follow along. Beginners benefit from video tutorials that demonstrate cutting, piecing, and assembly. These tools ensure accuracy and confidence, allowing quilters to troubleshoot common mistakes and achieve professional results. They are invaluable for bringing the Walk About Quilt design to life.
Seeking Community Support
Engaging with quilting communities enhances your Walk About Quilt journey. Online forums, social media groups, and local guilds offer valuable advice and inspiration. Participate in quilt-alongs or challenges to stay motivated and learn from others. Sharing progress and tips fosters camaraderie and troubleshooting. Community support provides encouragement, helping you overcome challenges and celebrate successes. Connecting with fellow quilters enriches the creative process, ensuring a rewarding experience from start to finish.